| Home | Contents | Start | Prev | 1 | 2 | 3 | 4 | 5 | 6 | 7 | 8 | 9 | 10 | 11 | 12 | 13 | 14 | 15 | 16 | 17 | 18 | 19 | Next |
Construction Techniques
Wiring
Wiring rapidly gets very complex and coming back to a project after a long absence (life/work gets in the way) means it is often difficult to pick up where you left off. Also, if a wire comes off, it is important to know where it came from! Wires can also snake all over the place and you rapidly end up with a rats nest.
Wiring Looms
I ran two main looms around the edge of the platform. One loom contained all power caobles, the other loom contained all the signal cables. Wires leave the loom where they are needed, and if a few are for the same destination, they are grouped together in a sub-loom. I decided to use nylon self-wrapping looms as it allows for easy insertion of extra wires as needed.
The top loom contains the signal wires. The bottom loom (under the receiver) contains power lines.

Wire labelling
Having individual wires labelled make maintenance much less painful. I experimented with various techniques and decided in the end to print my own labels. Each wire should have a unique wire number, as well as as a indicator of where it should connect to (eg arduino pin number). I settled on two types of label formers:
- A rectangular former that threads over the wire.
- A flat flexible strip that can be threaded over a terminated wire.
The label ids are printed off and glued to the former. The rectangular former allows for 4 different text items to be added whereas the flat strips only allow for two. I'll see which is the most useful as I move forward.

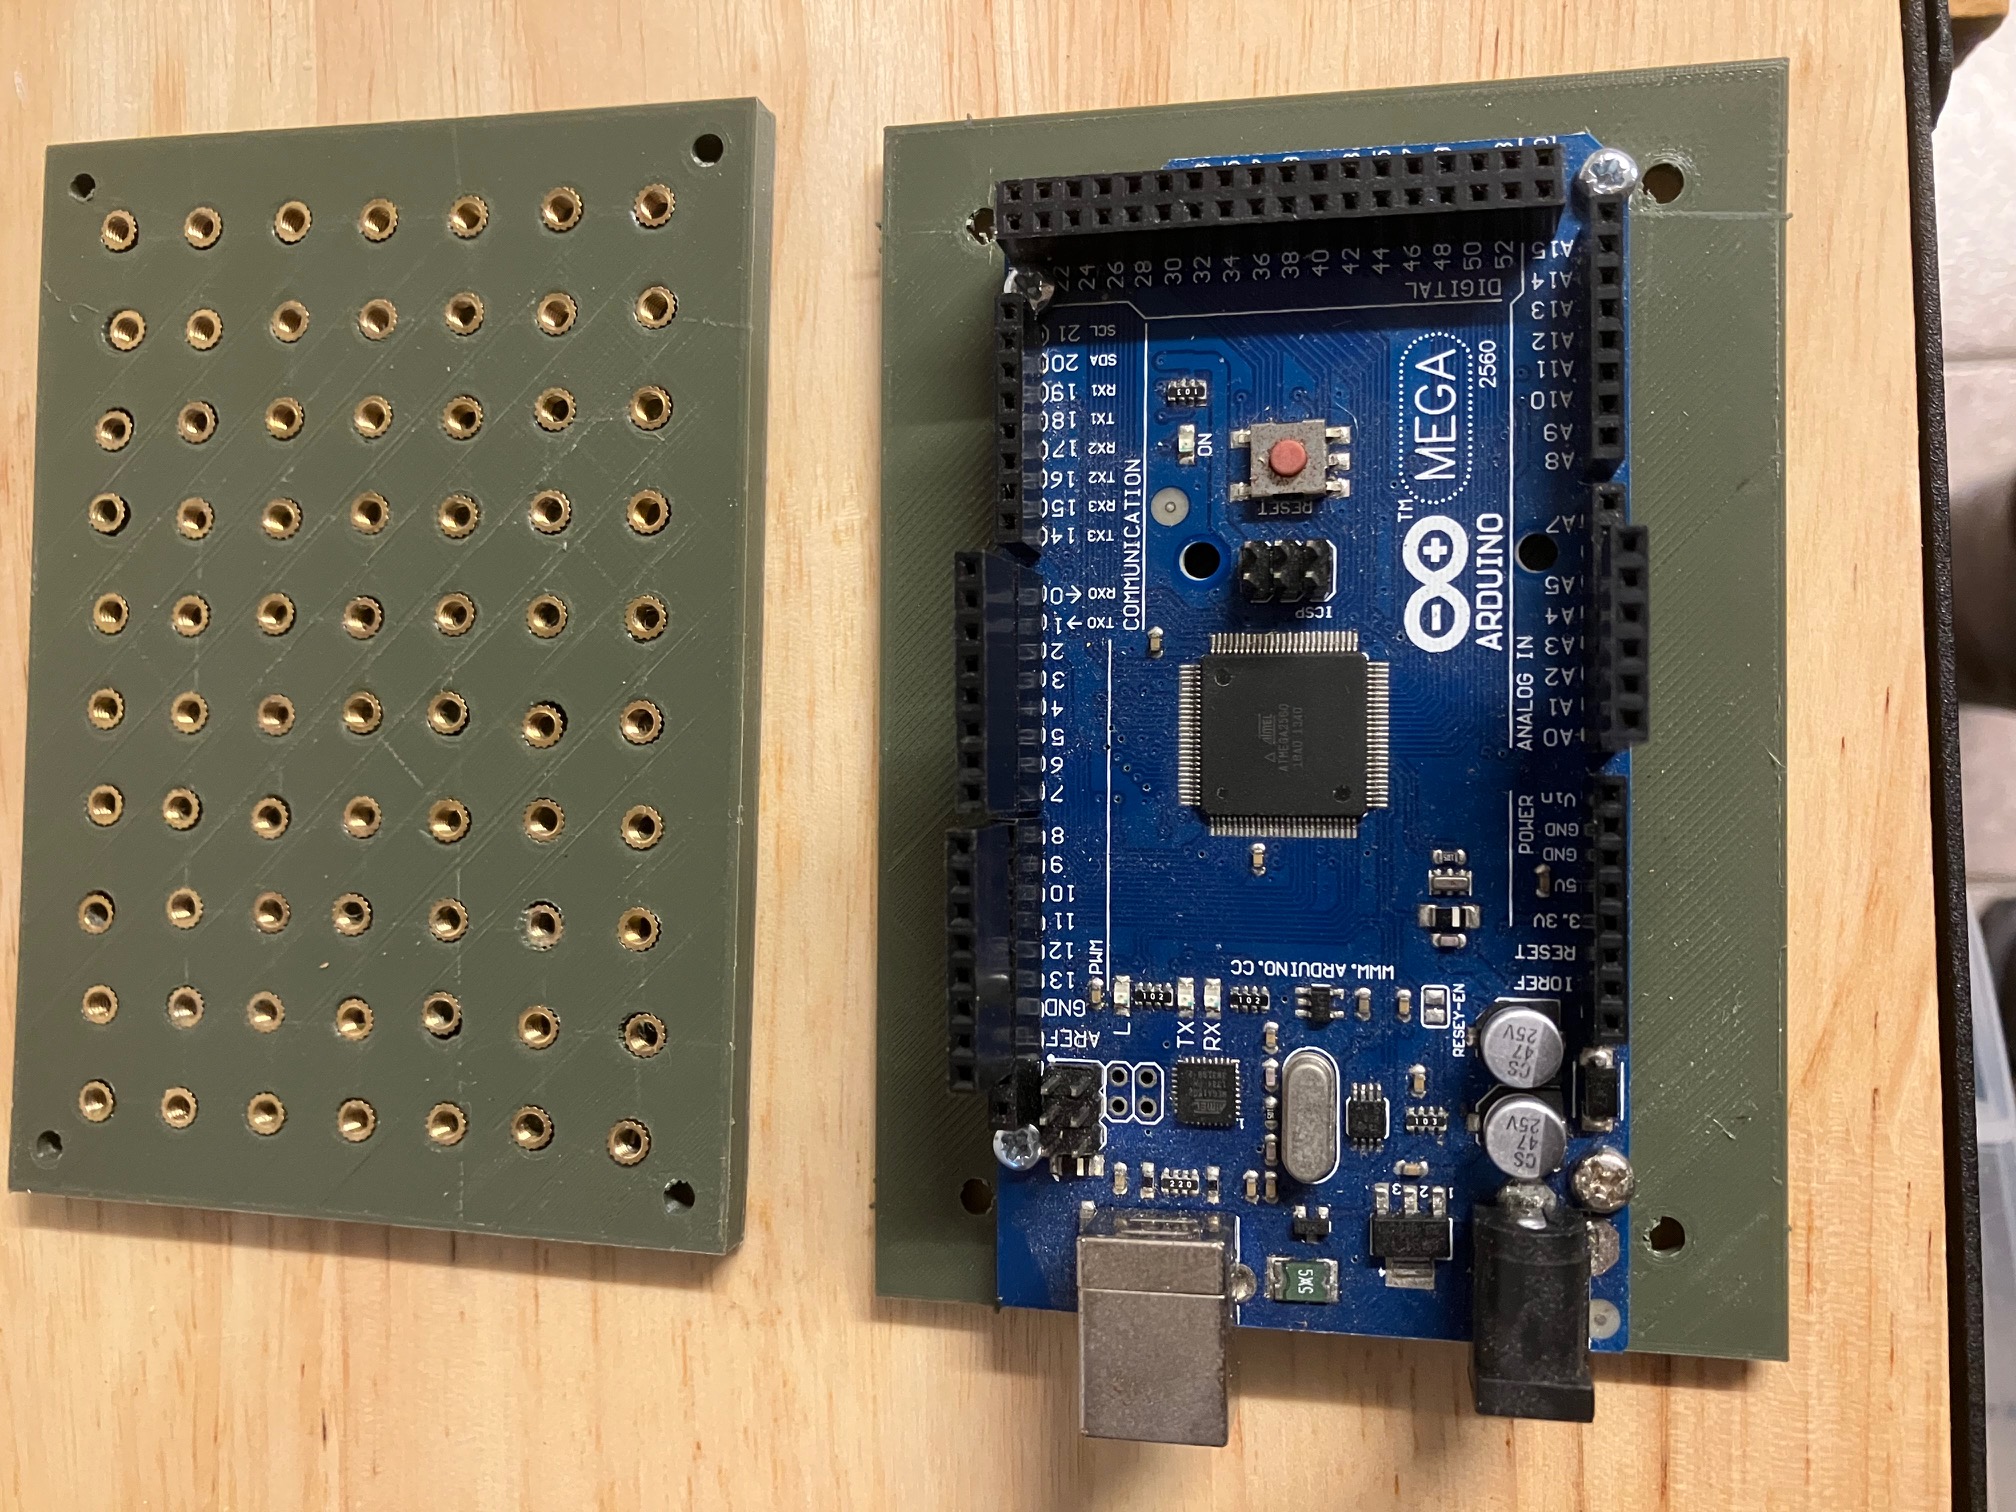
Board Mounting Solutions
I wanted the option to move boards around and to be able to mount them in different places as more functionality is added. My solution was to print a base-board that has a 10mm grid of 3mm holes (threaded inserts). The baseboard can then be screwed or glued to the base and boards mounted and moved around by simply unscrewing them and moving them around.
My original idea was to cover the whole base of the robot with these boards which would give a great deal of flexibility. However, they are very labour intensive so I made a couple and will use them as required, making more only if I need them. The Arduino Mega has very odd mounting hole dimensions so I had to make a custom mount for it that I could them mount on the baseboard. See the diagram below:
September 2025
| Home | Contents | Start | Prev | 1 | 2 | 3 | 4 | 5 | 6 | 7 | 8 | 9 | 10 | 11 | 12 | 13 | 14 | 15 | 16 | 17 | 18 | 19 | Next |