| Home | Contents | Start | Prev | 1 | 2 | 3 | 4 | 5 | 6 | 7 | 8 | 9 | 10 | 11 | 12 | 13 | 14 | 15 | 16 | 17 | 18 | 19 | Next |
Phase 4: April Tag Detection
Roadmap
The following is a plan of where I'm going:
- Capture images on the Pi camera and use in openCV.
- Any frame pre-processing. At least grey-scale but possibly size etc.
- Use openCV to detect Apriltag and read its ID.
- Extract pose from the tag to determine its relative position from the camera.
- Use openCV to display results (id, bounding boxes etc) - mainly diagnostics.
- Calibrate the camera.
Capturing images from the Pi Camaera for use with OpenCV
This was done previously with camera experimentation (see: Phase 3: Camera and OpenCV Research). Refer to:
Path: src/raspbery_pi/camera
capture3.py
preview.py
show.py
Image Pre-processing
Initially, only greyscale conversion to black-and-white is used. There is also some vertical/horizontal frame-flipping being done as the camera is mounted upside-down. It may be necessary to do some more pre-processing later. Examples:
cv2.imread("captured_25h9_2.jpg", cv2.IMREAD_GRAYSCALE)

and

config["transform"] = Transform(vflip=True, hflip=True)  # Vertically and Horizontal flip
Detecting Apriltags and extration of tagid
Initially, I tried using apriltags generated by using the raw SVG files. This failed until I realized you need a white border around the image. The raw tags did not contain this border (a 10cm tag was truely 10cm without a border). I altered the code to include the white border (12cm) which gave a 10cm tag and reading the raw files directly worked ok. Then I printed the tag, cut it out (with a border) and that too was detected.
The tags were generated on the mac. I took photographs with the pi camera and ran the detection code on the mac during development. See:
Path: src/raspberry_pi/april_tag_detection
detector.py
april_tag_detection.py
pose_estimation.py
detector.py output (detecting one raw tag and one in an image, checking all three families):
INVALID: Not detected in any AprilTag dictionary
INVALID: Not detected in any AprilTag dictionary
VALID: Detected as ID 6 in 18
INVALID: Not detected in any AprilTag dictionary
INVALID: Not detected in any AprilTag dictionary
VALID: Detected as ID 2 in 18
april_tag_detection.py uses two images, one with a single tag and one with two tags. It uses the openCV API to visualize this on the screen. Partial output:
Detected IDs: [[2]]
Detected IDs: [[2][3]]
For tag identification, the key openCV api call is:
corners, ids, _ = apriltag_detector.detectMarkers(image)
Pose Detection
pose_estimation.py uses an additional API (and various transforms) to find the roll, pitch and yaw of the tag in relation to the camera. Here are the results for the example tag:
roll:  -3.23551782253012
pitch:  -2.149221537598151
yaw:  -89.49696452186976
Here we can see I mounted the apriltag rotated by 90 degrees!
The key openCV api used for pose detection is:
success, rvec, tvec = cv2.solvePnP(objectPoints, imagePoints, cameraMatrix, distCoeffs)
Visualizing results
Visualizing results was included in some of the experimental files (eg april_tag_detection.py). I will not be likely to use this in the project, but instead plot the location on a map.
Camera Calibration
I used default calibration data and it seems to work well but this is in a close up indoor environment. Camera calibration will become more important with Visual Odometry so now sees a good time to get it out of the way :-)
I just followed the OpenCV instructions for calibrating the camera (performed on rangi, the dev Pi). The outline was:
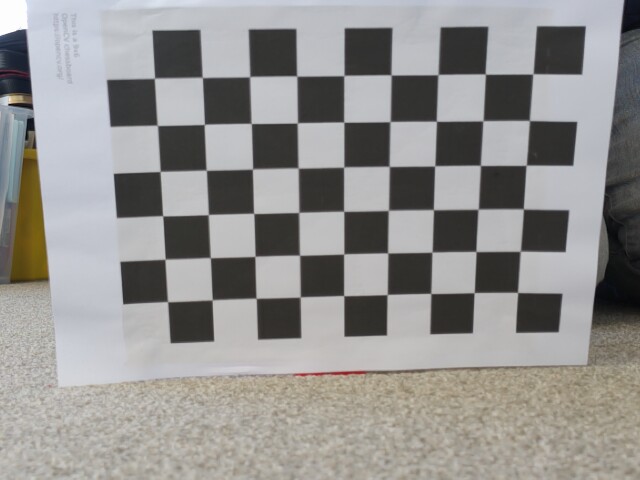
- Print out a 6x9 checkerboard image
- Capture 20 images of the checkerboard at various angles and distance from the camera
- Run the calibrate_camera.py program which will print out the cameraMatrix and distortion coefficents
See: kupe/src/raspberry_pi/camera

Used calibrate_capture.py to take the 20 calibration images which are stored in cal_images in this directory.
Used calibrate_camera.py to generate output
Here is one of the calibration images:
The output from the calibrate_camera was:
cameraMatrix:
[1.03137346e+03, 0.00000000e+00, 3.88624228e+02],
[0.00000000e+00, 1.02952144e+03, 2.52928957e+02],
[0.00000000e+00, 0.00000000e+00, 1.00000000e+00]

Distortion co-efficients:
[0.18072064, -0.68390226,  0.00486311,  0.03306225,  2.86542073]
These values were similar to the defaults I used in pose_estimation.py, but I replaced these coeffients in that program and ran it against the previous images to compare the returned value forroll, pitch and yaw:
roll:  3.92128092243898
pitch:  -4.9348340681629335
yaw:  -89.90042623913024
There is a difference of a few degrees which could have a significant effect at several metres. So that is done, although I may need to repeat it for each camera I use. So, onwards.
June 2026
| Home | Contents | Start | Prev | 1 | 2 | 3 | 4 | 5 | 6 | 7 | 8 | 9 | 10 | 11 | 12 | 13 | 14 | 15 | 16 | 17 | 18 | 19 | Next |