| Home | Contents | Start | Prev | 1 | 2 | 3 | 4 | 5 | 6 | 7 | 8 | 9 | Next |
Mounting the turbine and raising the tower
Now came the task of finally getting the turbine up in the air to see if it would actually generate any power at all in the poor wind conditions in my area. I was interested to see how the tail worked and whether it needed to be larger and/or required additional weighting to furl in higher winds. I'm sure there will lots of adjustments required to both the tail and the size of the blades themselves.
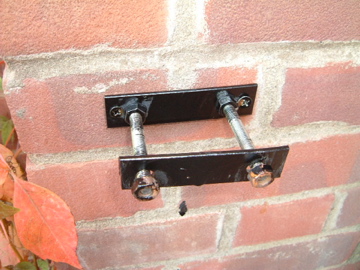
Tower Mounting Brackets
Now that my feathered friends have literarlly left their nest, I can return to the business of mounting and raising the tower. Originally I had hoped to drill right through the wall where the tower was due to be mounted but this was not possible. My solution was to screw plates to the wall (using rawl plugs) that had two 8mm bolts protruding and then make another plate that would slot over the bolts to clamp the tower to the wall. The diagram below shows the basic arrangement.
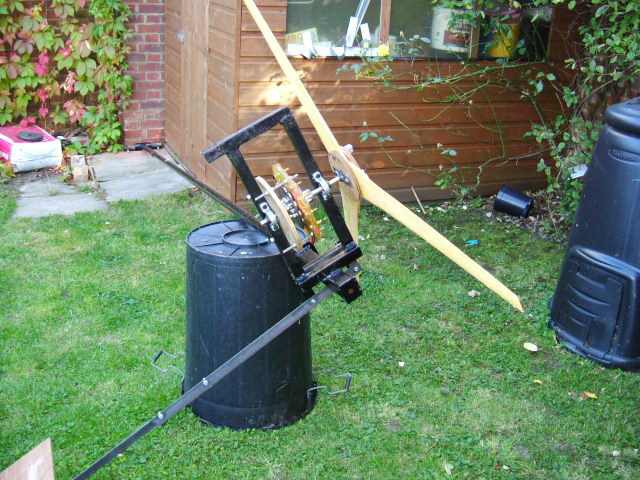
One bracket was attached to the wall. I had painted the pole and the tower hinge when a day arrived that was quite windy. I had no way of measuring the wind speed but would estimate that it was in excess of 20Km/h. It seemed a good opportunity to raise the tower temporarily to see how the mechanics behaved in this kind of wind. The diagram below shows the turbine mounted prior to raising the tower against the wall.
So with the help of a few friends, we raised the turbine for the first time. A few things became immediately apparent:
- The moment you put a wind turbine on a pole, the wind stops blowing.
- The tail vane was too small to turn the blade into the wind (for lighter winds)
- The tail may need extra weight at the bottom as it seemed to spill air too easily
This last point will need some investigation. The whole point of having a hinged tail is to spill air to protect the machine in high winds. It was spilling air admirably but I believe it will be necessary to first increase the tail area (and grease the top of the pole where it fits into the turbine frame). When I am happy that the machine will turn easily in low winds, I will come back and tweak the weight of the tail to achieve auto-furling.
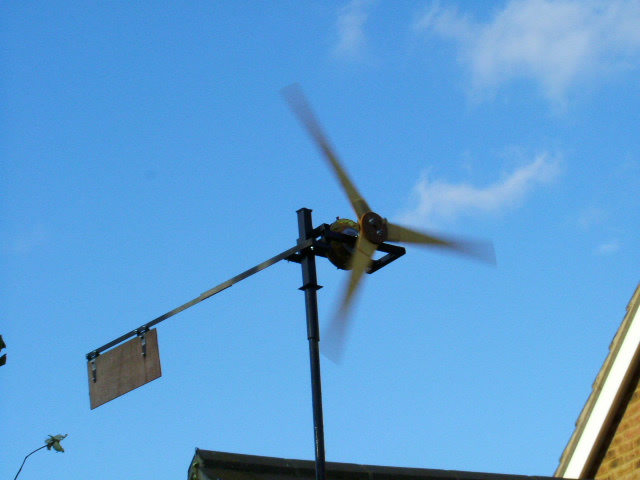
There was no electrical connection made to the machine during these tests so no load was applied to the turbine. The blades were free to rotate easily and once the machine had swung around into the wind, the blades started to turn slowly. I estimated that it was going at about 120 rpm once it started moving. Once things picked up, it went like stink, probably 500rpm or more which greatly exceeded my expectations. The wooden blades (which had been balanced after mounting on the turbine) ran almost silently. Even at high rpms, you could not ever say the sound was annoying, the rustling on leaves in the trees was louder. The picture below shows the machine on the tower
This initial test was hugely encouraging. The blades worked brilliantly and the speed of rotation and lack of noise were much better than I could have hoped for. I need to work on the tail arrangement for a while and then run some wires down from the turbine. Having a connected load make the blades much harder to turn but the load should not be applied until the blades are rotating at a reasonable speed. I cannot second-guess anything further at this stage so I need to work on a few things first and try them in anger. I was testing here in higher than normal winds, I suspect in lower 'unclean' winds, things will not be so rosey.
Initial Electrical Output Checks
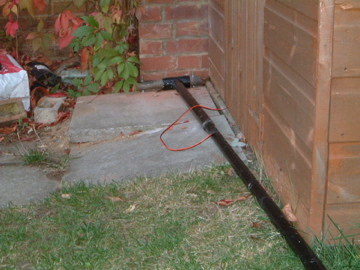
Another day, another test. Now the tower mounting infrastructure was in place, we ran some wire through the pole, drilling small hole in the tower to bring the cable out near the bottom, but above where it slotted into the hinge assembly.
The top of the pole where it inserts into the turbine was filed smooth and plenty of grease added to ease the swinging of turbine around the pole. All the tail dimensions were left as they were previously. There was less wind than during my previous tests but it was still quite breezy. So we raised the tower again, with a wired turbine attached. Greasing the pole made a considerable difference to the machine and it swung around into the wind quite easily. Time will tell if a larger tail is needed for lower winds, I am lucky to be testing in windy conditions!

The first test was open circuit voltage (VAC). Even when rotating very slowly, the machine generated 9 volts and once it started turning at a reasonable rate, we easily hit 14 volts. Large gusts of wind pushed the voltage even higher, it maxed out at about 28 volts when the furling seemed to kick in.
A single diode was used for rectification. This is hugely inefficient but I will tackle better testing when I've built some electronics. These test should give worst case results. DC voltage output was in excess of 12 volts. Connecting to a car battery gave a charge current of 100mA which was a little disappointing but it turned out the battery was nearly fully charged and would take little more.
Testing into a resistive load gave DC currents of about 600mA and I saw just under an amp when short-circuiting. Incidentally, at high winds, the turbine was slowed down but kept turning, even on a short-circuit.
These results are excellent! My goal was 12V and 1 amp and I would be happy with 12V 500mA as that is comparable to what I get from a couple of small solar panels. Even with one diode (ie losing half of the waveform), I am seeing close to the intended output. Once I have a bridge rectifier and reservoir capacitor in place, I believe I should easily achieve this goal. One thing that concerns me is the large output voltages that can be generated. I will need to build a regulator to bring the voltage down to about 14v dc.
Auto Furling Performance
The machine has been up and running for some time and keeps my batteries charged quite easily. Now the winter is upon us, I am pleased to say the wind speed is usually sufficient for the turbine to generate useful power at some time on most days. In fact, either I need to use the batteries more or else need to connect a regulator to prevent overcharging.
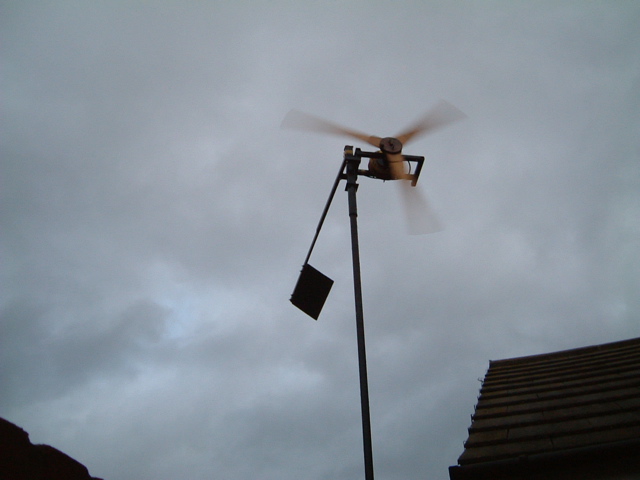
The furling mechanism seems to work very well. When strong gusts of winds arise, the turbine tries to turn out of the wind. The tail then starts to be presented to the wind and starts to swing and drop wind so the turbine stays out of the wind and tends to oscillate slowly back and forth in and out of the wind. For a constant strong wind, it turns out of the wind and seems to hit a maximum speed. It is such a simple design but appears to work very well. Here are a couple of photos showing the turbine in its furled state. You can see the tail has swung up away from the horizontal and the turbine is not actually facing into the wind. A little hard to show with a still picture but I'm sure you get the idea.
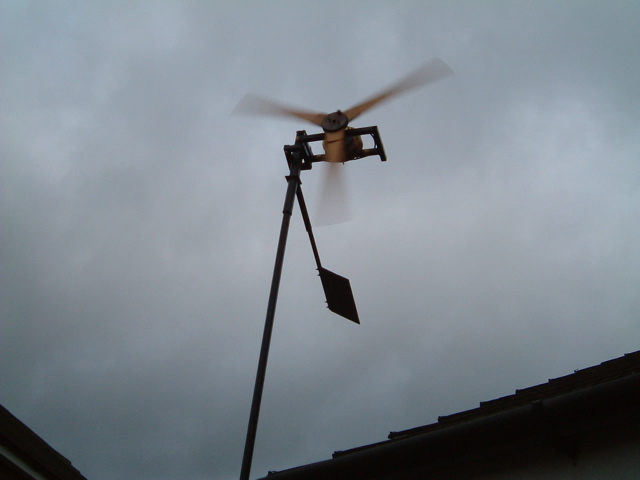
Here you can see it from a different angle. This was a strong wind and the machine was getting close to being 90 degrees out of the wind having been turned anti-clockwise on the pole. Even when this far out of the wind, the blades were rotating very quickly although it was noticeable that they had slowed down somewhat from being head-on to the wind.
The only task left now is to completely dismantle the turbine, tighten, paint, glue and fix everything in place and then get it up on the pole permanently. I'm keen to monitor the tail and the furling mechanism as these may need adjusting. Still a lot to do...
17 Sept 2007
| Home | Contents | Start | Prev | 1 | 2 | 3 | 4 | 5 | 6 | 7 | 8 | 9 | Next |