| Home | Contents | Start | Prev | 1 | 2 | 3 | 4 | 5 | 6 | 7 | 8 | 9 | Next |
Final Assembly
The turbine was taken down and completely dismantled. It was time to tighten, paint, varnish and glue. Not really the most exciting part of the project but once on the pole, I don't really want to worry about the machine and so nothing should fall off or decay too quickly.
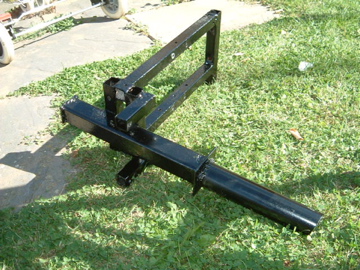
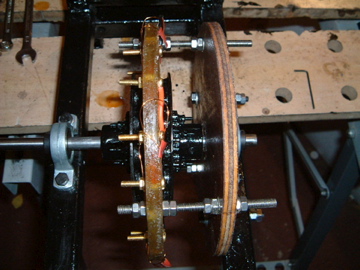
Black metallic paint was used for all the steel parts, the same stuff the pole was painted with. It would have been easier to use spray-paint but as I had some metal paint lying around, it seemed the best thing to use. The figure below shows the main frame.
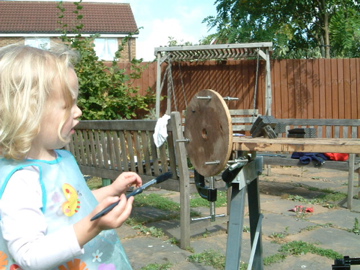
The wooden parts, namely the stator bracket and the blades had been treated with teak oil. Although this should be ok for weatherproofing, I personally was not convinced so bought some yatchet varnish. I had a willing helper who did a fine job of varnishing :-)
I decided to paint the tail black rather than varnish it, the machine looks a bit less heath-robinson that way, all black with wooden blades.
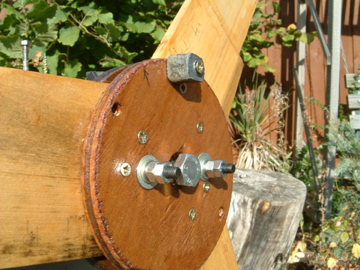
Here is a close-up of the blade hub after it had been varnished. Note the lump of lead screwed to the outer part of the hub. This was added to balance the blades as I obviously had not made all three exactly the same and they always tended to rest on one position. By turning the blades and finding where the heavy parts were, I was able to determine where to add the weight. The balancing had been done when the machine was assembled so I marked all the parts so I would put it back together the same way. This means the whole machine was balanced, rather than just the blades.
Now the machine was reassembled as before. The back bearing was mounted, then the stator support, then the first rotor (now a nice shade of black). All the magnets had been glued down again, just in case. The wooden spacer had also been soaked in varnish before being slid onto the shaft.
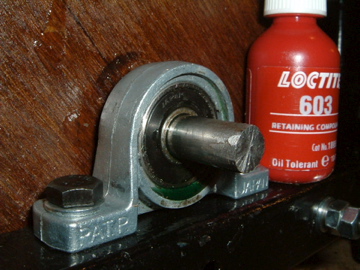
Next came the stator, followed by the second rotor and the second bearing. You will see that everything is now using lock-nuts to hold things in place. The bearings and tail also had spring washers and everything was tighted up for the last time.
As I don't want anything to fall off, now was the time to glue the bearings to the shaft. This is really the point of no-return as once they are glued on, it will be very hard to remove anything without the persuation of a large hammer which will damage the shaft. Both bearings were glued on both sides.
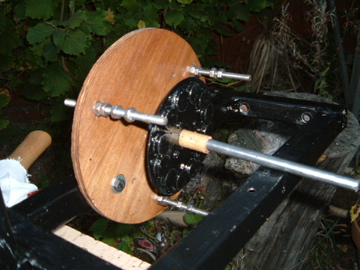
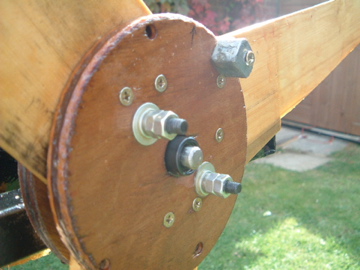
The tail was bolted to the assembly and then the blades added. The blades were fixed to the shaft using a grub screw and then glued both sides of the joint. As an extra precaution, a collet was added to the end of the shaft and glued in place. This was really just an extra safety precaution as the blades coming off is what I perceive to be the biggest safety threat. The diagram below shows the collet in place.
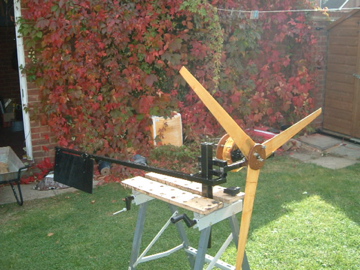
The machine was finished! It just needed to be put over the end of the pole and wiring up to the output of the stator. Here is a picture of the machine after it was finally complete.
23 Sept 2007
| Home | Contents | Start | Prev | 1 | 2 | 3 | 4 | 5 | 6 | 7 | 8 | 9 | Next |