| Home | Contents | Start | Prev | 1 | 2 | 3 | 4 | 5 | 6 | 7 | 8 | 9 | 10 | 11 | 12 | 13 | 14 | 15 | 16 | 17 | 18 | 19 | 20 | 21 | 22 | 23 | 24 | 25 | 26 | Next |
Raspberry Pi
The Pi on the mower is named moana. I have a seperate Pi that will be used as a prototyping platform called maui.
| Pi | ip | user | Notes |
|---|---|---|---|
| maui | 192.168.1.222 | pi | Development pi |
| moana | 192.168.1.72 | pi | In sensor barrel (mower). |
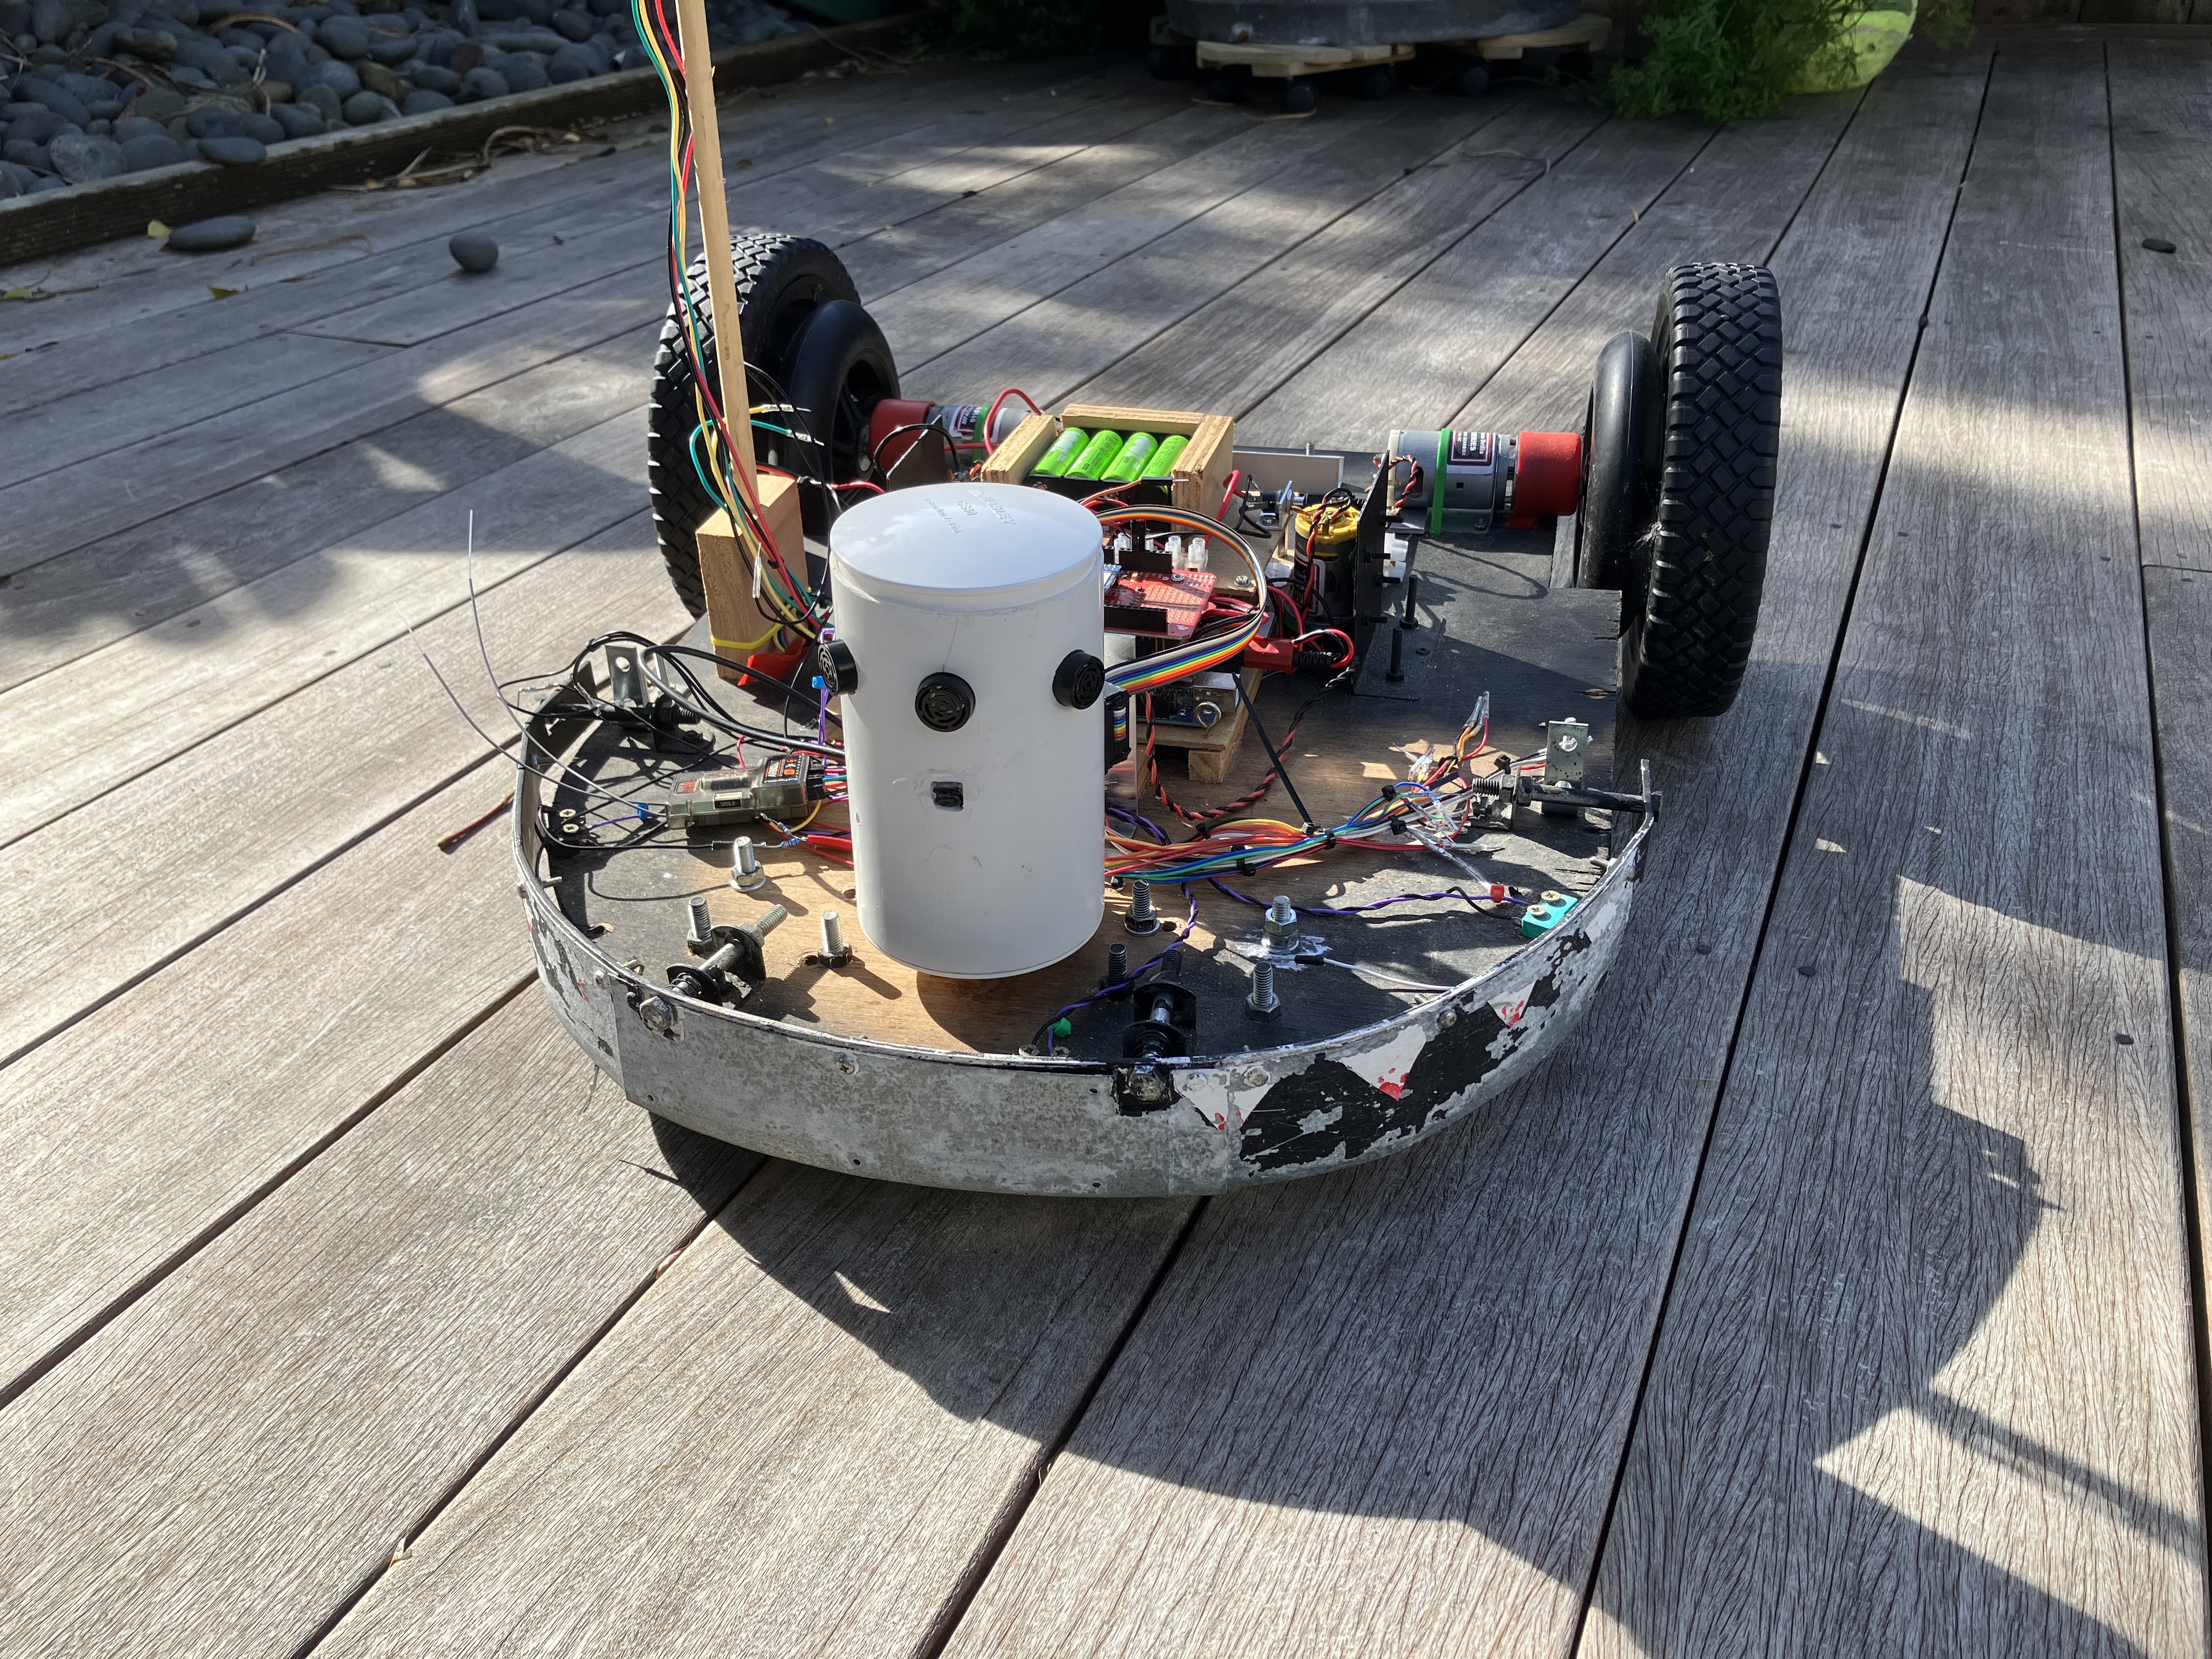
The Rasberry Barrel Mounted on Moana
The sensor barrel is finally complete. Here it is mounted on the mower. It sits on a small ring and is bolted through the mower deck.
The old basic grass-capture program was loaded onto moana (pi) to see how the barrel changed the type of images being captured. Due to the way it is mounted in the barrel, there is no need to flip the image by 180 degrees. After doing this, here is a higher resolution image taken from the barrel.
Two key points to notice are:
- The camera is looking straight ahead. It captures distant objects and a large part of the sky.
- There is a blind spot 30 cm in front of the mower.
I believe the sonars will give sufficent coverage of what lies ahead of the mower. The camera is meant to be focussing on grass so I feel it needs to be angled down more towards the ground in front of the mower. This should help with grass recognition as it wont get sidetracked by distant trees. I can also put a 'visor' over the top of the camera to mask out the sky but this wastes processing cycles during image recognition so I feel suitably angling the camera is a better option. Unfortunately, this may not be so easy on the barrel without considerable modification.
Camera Angling Solutions
- Angle the whole barrel
- Try and angle the camera module inside the barrel.
- Bring the camera outside the barrel and angle it on the outside.
Angling the whole barrel is the easiest option as it just requires a wedged ring under it. The tower certainly looked weird when I tried this but I am concerned the sonars will also point down and may give false triggering.
Angling the camera module inside the barrel may be a good compromise. It depends on how much space there is to play with. On closer inspection of the camera module, it appears the actual camera lens can be detached from the board and it possible to angle it as the flexible circuit connector gives a bit of wiggle room. This was done and hot glued in place and assembled back into the vertically mounted tower. This gave much better results, with a 7cm blind-spot but without distractions from distant objects.
Configuring the Raspberry Pi
I aim to build a Neural Network that runs on the Raspberry Pi to recognize grass. In order to achieve this goal, I need to to load TensorFlow and OpenCV on the Pi. Unfortuantely, neither of these apps are available on the Pi natively so it is necessary to build them from source. This is a rather convoluted process so I'll detail them here.
  sudo apt update
  sudo apt upgrade
Virtual Environments
Due to all the dependencies, I am creating a virtual environment (grassenv) under ~/Documents/grass where I will build environment.
python3 -m pip install virtualenv cd Documents/grass python3 -m virtualenv grassenv source grassenv/bin/activate (grassenv) pi@maui:~/Documents/grass $ |
Tensorflow
Loading fetching relevant libraries
|
sudo apt-get install -y libhdf5-dev libc-ares-dev libeigen3-dev gcc gfortran libgfortran5 libatlas3-base libatlas-base-dev libopenblas-dev libopenblas-base libblas-dev liblapack-dev cython3 libatlas-base-dev openmpi-bin libopenmpi-dev python3-dev build-essential cmake pkg-config libjpeg-dev libtiff5-dev libpng-dev libavcodec-dev libavformat-dev libswscale-dev libv4l-dev libxvidcore-dev libx264-dev libfontconfig1-dev libcairo2-dev libgdk-pixbuf2.0-dev libpango1.0-dev libgtk2.0-dev libgtk-3-dev libhdf5-serial-dev libhdf5-103 libqt5gui5 libqt5webkit5 libqt5test5 python3-pyqt5 |
In order to know which Pi wheel to download, it is necessary to know which architecture and python3 versions I'm running.
uname -m armv7l python3 -V 3.7.3 Here is the wheel site: https://github.com/PINTO0309/Tensorflow-bin/tree/main/previous_versions download_tensorflow-2.5.0-cp37-none-linux_armv7l_numpy1195.sh |
tensorflow 2.5 with pythone3.7 is the highest I can load on my Pi 3B (on architecture armv71), along with numpy 1.1.9.5. So the download file is executed:
|
#!/bin/bash curl -sc /tmp/cookie "https://drive.google.com/uc?export=download&id=1iqylkLsgwHxB_nyZ1H4UmCY3Gy47qlOS" > /dev/null CODE="$(awk '/_warning_/ {print $NF}' /tmp/cookie)" curl -Lb /tmp/cookie "https://drive.google.com/uc?export=download&confirm=${CODE}&id=1iqylkLsgwHxB_nyZ1H4UmCY3Gy47qlOS" -o tensorflow-2.5.0-cp37-none-linux_armv7l.whl echo Download finished |
Uninstall any old tensorflow and install the appropriate tensorflow wheel.
chmod +x tensorflow-2.5.0-cp37-none-linux_armv7l.whl sudo pip uninstall tensorflow pip install tensorflow-2.5.0-cp37-none-linux_armv7l.whl |
Checking installation is ok:
(grassenv) pi@maui:~/Documents/grass $ python3 Python 3.7.3 (default, Jun 29 2023, 18:03:57) [GCC 8.3.0] on linux Type "help", "copyright", "credits" or "license" for more information. >>> import tensorflow >>> tensorflow.__version__ '2.5.0' >>> |
OpenCV
  OpenCV
  sudo apt-get update && sudo apt-get upgrade && sudo rpi-update

  sudo vi /etc/dphys-swapfile
  and edit the variable CONF_SWAPSIZE :
  #CONF_SWAPSIZE=100
   CONF_SWAPSIZE=2048

  Restart
  Cd Documents/grass
  Source grassenv/bin/activate

  apt-get install build-essential cmake pkg-config
  apt-get install libjpeg-dev libtiff5-dev libjasper-dev libpng12-dev
  apt-get install libavcodec-dev libavformat-dev libswscale-dev libv4l-dev
  apt-get install libxvidcore-dev libx264-dev
  apt-get install libgtk2.0-dev libgtk-3-dev
  apt-get install libatlas-base-dev gfortran

  wget -O opencv.zip https://github.com/opencv/opencv/archive/4.1.0.zip
  wget -O opencv_contrib.zip https://github.com/opencv/opencv_contrib/archive/4.1.0.zip
  unzip opencv.zip
  unzip opencv_contrib.zip

  cd ./opencv-4.1.0/
  mkdir build
  cd build

  cmake -D CMAKE_BUILD_TYPE=RELEASE \
   -D CMAKE_INSTALL_PREFIX=../.. \
   -D INSTALL_PYTHON_EXAMPLES=ON \
   -D OPENCV_EXTRA_MODULES_PATH=../../opencv_contrib-4.1.0/modules \
   -D BUILD_EXAMPLES=ON .

  make -j4

  make install && sudo ldconfig

  Sudo reboot

  Python3 -m pip install opencv-python
Image Pre-Processing
The Pi camera minimum resolution is 64x64 pixels. As I am going to be limited on processing power, I think 32x32 will be sufficient. what I lose in resolution, hopefully I can make up with machine learning layers! I'm not 100% sure of all the pre-processing I need, but at least one step is to knock down the resolution to 32x32. I will need to do this for the complete training set but also on-the-fly when running in prediction mode. Here are the first steps at pre-processing but this will probably get extended as time goes on.
import numpy as np
import cv2

img_file = "./grass_test.jpg"
outdir = "./output"

"""
We may to add interpolation during the resize step.
We may wish to do some kind of normalization to account for daylight conditions.
There may need to be a conversion from cv2 array to numpy array somewhere.
"""
def pre_process_image(img_file):
    img_gray = cv2.imread(img_file, cv2.IMREAD_GRAYSCALE)
    img = cv2.resize(img_gray, (32,32))
    return img

img = pre_process_image(img_file)
output_image_filename = f"{outdir}/{img_file}"
cv2.imwrite(output_image_filename, img)
|
I believe it is possible to stream the output from the camera directly into a numpy array which is something that may be worth investigating when doing live image-predictions. However, initially, I'm going to keep writing to files on the disk unless it become necessary to change for performance reasons.
July 2023
| Home | Contents | Start | Prev | 1 | 2 | 3 | 4 | 5 | 6 | 7 | 8 | 9 | 10 | 11 | 12 | 13 | 14 | 15 | 16 | 17 | 18 | 19 | 20 | 21 | 22 | 23 | 24 | 25 | 26 | Next |